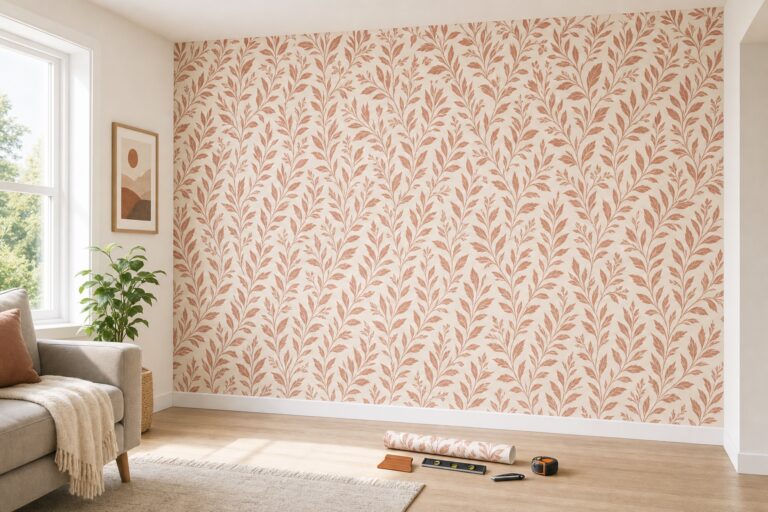
No Drill Wall Decor: Start With Your Wall, Not the Hook

Every no-drill wall decor guide gives you the same list: command strips, washi tape, leaning art, picture ledges, a few plants. What none of them asks is the question that decides whether any of it works — what is your wall actually made of?
Adhesive strips fail on more American walls than they succeed on, and the manufacturer says so in its own instructions. Start there and you will stop wasting money on the method your wall was never going to hold.
Jump to a section
- Your wall surface decides the method, not your budget
- Textured walls are the reason adhesive strips fail
- What the adhesive instructions actually require
- Leaning is the method that never fails
- A picture ledge turns one fixing into a whole wall
- Tension rods hold more than curtains
- The over-door rail is the wall you forgot you had
- Weight is a harder limit than most people think
- Take it down the way the instructions say, or it takes the paint
- When drilling two small holes is the better choice
- The wall plan that needs no holes at all
- FAQ
Your wall surface decides the method, not your budget
Look at your wall in raking light before you buy anything. Adhesive is the method everyone reaches for first, and it is the only one on the list with hard surface restrictions.

3M's guidance for Command products is that they hold to painted, stained or varnished wood, glass, tile, metal, painted drywall and other smooth surfaces — and that they should not be used on textured walls or surfaces, wallpaper, brick, rough or non-stick surfaces, or fabrics.
Read that list against a real American rental and the problem is obvious. Orange-peel and knockdown wall texture is standard in a huge share of US apartments, especially anything built or refinished in the last forty years. If that is your wall, the strips were never going to work, no matter how carefully you followed the steps.
So sort yourself first:
- Smooth painted drywall or plaster — adhesive is on the table, along with everything else in this article.
- Textured, orange-peel or knockdown — skip adhesive entirely. Go to leaning, freestanding, tension and over-door.
- Wallpaper — skip adhesive. It lifts the paper, and that is a repair, not a scuff.
- Brick or rough masonry — skip adhesive. Brick clips that hook over the mortar line work, and leaning works.
- Painted in the last week — wait. More on that below.
The good news is that four of the five methods in this article do not touch the wall at all, so they work on every surface in that list.
Textured walls are the reason adhesive strips fail
An adhesive strip needs continuous flat contact, and a textured wall only gives it the tops of the bumps. This is the mechanism behind almost every "the strips didn't hold" story, and it explains why the failure is usually sudden rather than gradual.
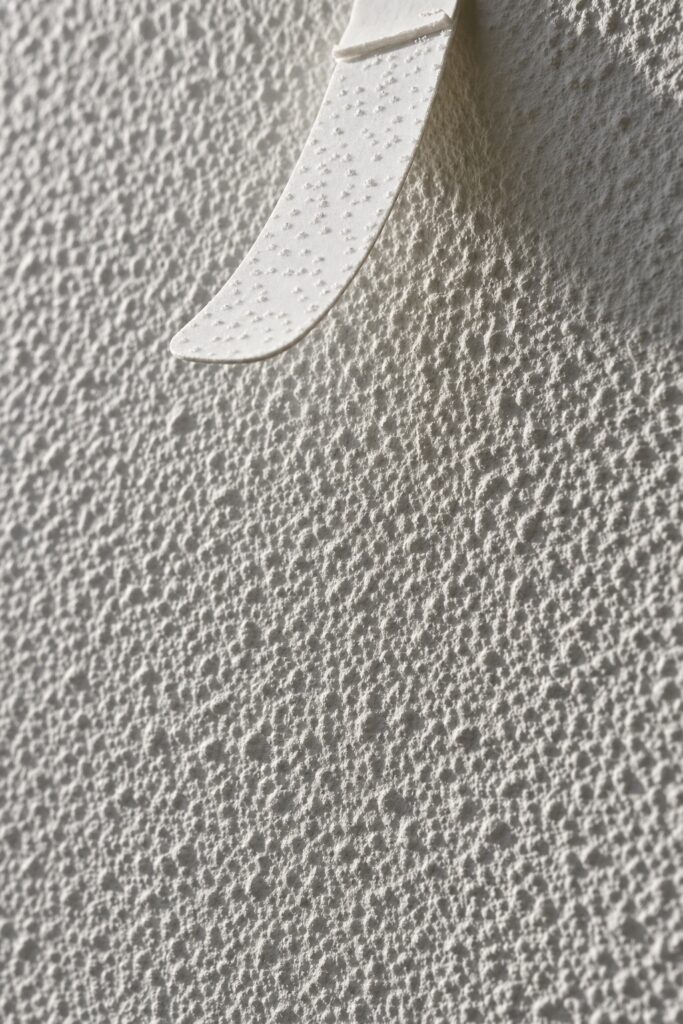
Hold a phone light flat against your wall and look along the surface. If you can see a field of small shadows, you have texture. Smooth wall casts none.
The tell after a failure is the strip itself: pull one off a textured wall and the adhesive face is still mostly clean, because most of it never touched anything. On a smooth wall the same strip comes away with an even, dulled, fully-contacted face.
There is no workaround worth doing. Sanding the texture flat is a repair you will have to undo, and a bigger strip on a bumpy wall is still a bumpy wall. On texture, use the methods that rest on the floor, the door, or their own tension.
What the adhesive instructions actually require
If your wall is smooth, the strips work — but only if you do the three steps nobody does. These come straight off 3M's own printed instruction sheet, and skipping any one of them is the difference between a frame that stays up and a frame on the floor.

- Wipe the wall with rubbing alcohol. The instructions are specific: "Wipe wall with rubbing alcohol. Do not use household cleaners or water." Household cleaners leave a residue the adhesive cannot bond through, and this single step causes more failures than any other.
- Press each strip against the wall for 30 seconds. Not a press-and-let-go. The sheet says "Press each strip on wall for 30 seconds."
- Then wait an hour before hanging anything. "Wait 1 hour for adhesive to build." The bond is not at full strength when you let go of it.
Two more conditions from the same sheet that catch people out:
- Wait 7 days after painting. "Wait 7 days after painting before use." Fresh paint is still curing and the strip will take it off with it.
- Use indoors between 50 and 105°F (10 to 40°C). A cold garage wall or a sun-baked room in August is outside the working range.
The sheet also says not to hang valuable items, not to hang anything over a bed, and not to use the strips on wallpaper. Those are not fine print — they are the manufacturer telling you where its product stops.
Leaning is the method that never fails
Nothing beats gravity. Leaning works on every wall surface, holds any weight, and leaves nothing to repair. It is also, unhelpfully for a listicle, the least exciting answer, which is why it gets one line in most guides and deserves the most.

The reason it looks good rather than lazy is scale. A leaned piece has to be big — large enough that it reads as a deliberate choice rather than a picture you failed to hang.
- On the floor: one large frame or a mirror, ideally 30 inches tall or more, resting against the wall behind a console, a sofa, or in a corner. Small frames on the floor look like moving day.
- On a console or mantel: two or three frames of different sizes, overlapping front to back, with the largest at the back. The overlap is what makes it read as styled.
- On a shelf: one leaning piece at the end of a row of books, at an angle to everything else.
Two practical notes. Put a strip of felt or a rubber bumper on the bottom edge of anything leaning on a hard floor, so it does not slide or scuff. And if you have small children or a large dog, a big leaning mirror needs a discreet strap to the wall — that is a safety fixing, not decoration, and it is the one hole worth arguing for.
A picture ledge turns one fixing into a whole wall
A single ledge lets you display six pictures for the cost of one attachment. This is the best value in the entire no-drill toolkit, and it stays useful because you can rearrange it in seconds.

The ledge itself needs mounting — with adhesive strips on a smooth wall, or with two small screws if you decide holes are acceptable. Either way you have gone from one fixing per picture to one fixing for the whole arrangement.
How to style it so it does not look like a shop shelf:
- Overlap the frames front to back rather than lining them up edge to edge. Largest at the back, smallest in front.
- Mix sizes deliberately. Six identical frames read as a product display; three large, two medium and one small reads as collected.
- Leave one end lighter than the other. A perfectly balanced ledge looks staged.
- Let one thing be not-a-picture — a small plant, a leaning postcard, a stoneware jug.
Height: put the ledge so the top of the tallest frame lands around eye level for a standing adult, roughly 60 to 65 inches from the floor. Over a sofa, drop it so there is a hand's width of clear wall above the sofa back.
Tension rods hold more than curtains
A tension rod presses against two opposing surfaces and touches nothing else. It is the most underused tool on this list, because most people only think of it for shower curtains.

Anywhere you have two walls facing each other — an alcove, a recessed window, the inside of a closet, a narrow hallway nook — a tension rod turns that gap into a hanging point with zero fixings.
What it will carry:
- Hanging plants in lightweight slings, spread along the rod rather than bunched at the middle.
- A textile clipped on with plain wooden clips — a length of fabric, a small rug, a woven hanging.
- Lightweight frames on clips or S-hooks.
- A second curtain layer, or a curtain used as a room divider.
The limits are real. Load a tension rod near its center and the whole thing wants to bow and slip. Spread the weight toward the ends, buy the widest-diameter rod that fits, and test it by pulling downward before you trust anything to it. If it moves at all, it is too heavy or too wide a span.
The over-door rail is the wall you forgot you had
Every door in your home is a vertical surface you are allowed to use, and an over-door rail needs no fixing at all. It simply hooks over the top edge.

This is the method that solves the rooms with no usable wall — a small bathroom, a narrow hallway, a bedroom where every wall has a window or a closet in it.
What works on the back of a door: a full-length mirror on a strap, a soft hanging textile, a row of hats, a small hanging organizer, or a wreath in season.
Two things to check before you buy. First, measure the thickness of your door and match the hook's opening — hooks that are too wide rattle and mark the door edge, and hooks that are too narrow will not go on. Second, check the clearance at the top of the door frame; a thick hook on a tightly fitted door will stop it closing.
Hollow-core doors — most modern interior doors — are lighter than they look. Keep the load modest, and hang it high on the door rather than low, where a swinging weight has more leverage.
Weight is a harder limit than most people think
Every no-drill method has a ceiling, and the adhesive one is lower than people expect. 3M's own picture-hanging strips are rated by size: the small strips hold up to 2 or 4 pounds and suit frames up to about 8 by 10 inches, while the large strips hold up to 8 or 16 pounds and suit frames up to about 24 by 36 inches.

Sixteen pounds sounds generous until you weigh a real mirror. Put your object on a kitchen scale before you buy anything.
Sort what you own into three groups:
- Under 2 pounds — unframed prints, paper, lightweight garlands, thin frames. Almost anything works, including washi tape and small strips.
- 2 to 16 pounds — most standard framed pictures. Adhesive strips work if your wall is smooth and you follow the prep, and a picture ledge or a lean both work regardless.
- Over 16 pounds — heavy mirrors, anything with glass at scale, shelving that will hold objects. Lean it or stand it. Do not test the top of an adhesive rating with something that will break and take the paint with it when it goes.
The failure mode matters as much as the number. A print falling off is an annoyance. A framed mirror falling off a wall is broken glass on the floor, and it usually pulls paint on the way down.
Take it down the way the instructions say, or it takes the paint
More deposit damage comes from bad removal than from bad mounting. The strips are designed to release cleanly, but only if you stretch them, and almost nobody does.

The instruction sheet is explicit: "Never pull away from wall. Stretch strips slowly against the wall at least 15 inches (38 cm)" for the large strips, and at least 6 inches (15 cm) for the small ones. The strip is meant to elongate along the wall until it lets go.
Pull straight out instead and the adhesive stays bonded while the paint layer gives way — which is how you get a ragged patch of missing paint the size of a playing card.
A removal routine that works:
- Take the object off the wall first, so you are not holding weight while you work.
- Find the tab and grip it flat against the wall, not away from it.
- Pull slowly, straight down, keeping the strip flat against the surface the whole way. Slowly matters — fast stretching snaps the strip.
- If a tab snaps off, warm the strip with a hairdryer on low for a minute and try to work dental floss behind it rather than levering it off.
Check before your lease ends, not on the last day. If paint has come away, a small tub of matching paint and ten minutes fixes it. Discovering it during the final walkthrough does not.
When drilling two small holes is the better choice
Sometimes the drill is genuinely the lower-damage option, and it is worth saying so plainly. A nail hole is a repair that takes two minutes and a fingertip of filler. A patch of paint torn off by a failed adhesive strip is a bigger repair than the hole you were avoiding.

Drill or nail when:
- The object is heavy — a real mirror, a loaded shelf, anything with substantial glass.
- The wall is textured, and you want it on the wall rather than leaning.
- It is going above a sofa, a bed or a crib, where a fall matters. 3M's own instructions say not to hang things over a bed with these strips.
- It needs to be exactly somewhere and stay there for years.
Filling a nail hole: a dab of lightweight spackle on a fingertip, wiped flush, left to dry, sanded lightly with a fingernail or fine paper, and touched in with matching paint. Done properly it is genuinely hard to find.
Check your lease. Many US leases permit small nail holes as normal wear and only object to anchors, large holes, or unfilled damage. Reading the actual clause takes two minutes and often settles the question. If you are unsure, ask the landlord in writing — a "yes" in an email is worth more than any hook.
The wall plan that needs no holes at all
Here is the whole thing as a plan for one room, using nothing that touches the wall. This is what to do if your walls are textured, your lease is strict, or you simply do not want to think about it.

- One large leaning mirror on the floor against the biggest empty wall. It is the single highest-impact object in the list and it bounces light around a small room.
- A console or low shelf below or beside it, carrying two or three overlapping leaning frames.
- One tall freestanding shelf unit for the vertical interest a hung shelf would have given you, holding baskets, books and a plant.
- A tall plant to fill the corner that furniture cannot.
- The back of the door for the one thing you would otherwise have hung — a mirror, a textile, hooks.
- A tension rod in any alcove or recess for plants or a hanging.
That is a fully decorated room with zero fixings, zero repairs and nothing to explain at the walkthrough. If you later find your walls are smooth and you want more, our guide to decorating with adhesive hooks covers the weight classes in detail, and the bedroom wall guide works through arrangement above a bed specifically.
FAQ
Do Command strips work on textured walls?
No. 3M's own guidance is not to use Command products on textured walls or surfaces, wallpaper, brick, rough or non-stick surfaces, or fabrics. If your wall casts small shadows under a raking light, it is textured, and adhesive is the wrong method — use leaning, freestanding, tension rods or over-door hooks instead.
Why do my adhesive strips keep falling off a smooth wall?
Almost always one of three things: the wall was cleaned with a household cleaner or water instead of rubbing alcohol, the strip was not pressed for a full 30 seconds, or something was hung before the one-hour bond time. Paint applied within the last seven days will also fail.
What is the strongest no-drill way to hang something heavy?
There is not a good adhesive answer above about 16 pounds. For anything heavier, the strongest no-drill option is not hanging it at all — lean it on the floor or stand it on furniture. If it must be on the wall, two small screws with a proper repair at move-out will do less damage than a failed strip.
Will removing wall decor damage rental paint?
Only if you pull straight out. The strips release cleanly when stretched slowly along the wall — at least 15 inches for large strips, 6 inches for small ones. Take the object off first, keep the strip flat to the wall, and go slowly.
What can I use instead of nails on a wall I cannot touch at all?
Leaning art, floor mirrors, freestanding shelf units, tension rods in alcoves, over-door hooks, and tall plants. Between them they cover art, storage, mirrors and height without a single fixing.
Does washi tape damage paint?
Usually not on well-cured paint, and it is genuinely useful for lightweight paper — prints, postcards, a paper garland. Test it on a hidden patch first, remove it slowly at a shallow angle, and do not leave it up for years in direct sunlight, where the adhesive can bake on and the paint around it can fade unevenly.