
Cinder Block Bench: How to Build One You’ll Actually Want to Sit On


Picture a cool fall evening in your backyard. The string lights along the fence flick on. They glow over a long, low bench: sage-green blocks, honey-colored wood, a thick cream cushion and two soft pillows.
Your best friend sinks into it with a mug of cider and asks, "Wait. Are those cinder blocks?"
This guide contains Amazon affiliate links. As an Amazon Associate I earn from qualifying purchases, at no extra cost to you.
They are. That's the cinder block bench from our video, and you can build it yourself in a weekend, with no saw and no drill. The ten blocks and six 4x4s that make it cost under $100 at US stores.
Whenever a video of one of these goes around, the comments ask the same things. Isn't it hard to sit on? What glue holds it? Won't the back fall off when you lean? Every answer is below, with 7 steps and a picture for each, plus the five mistakes people point out in the comments.
At a glance
- Time: a weekend, then up to a week before anyone leans back, while the glue cures
- Skill: beginner. No saw, no drill and no screws.
- Cost: about $230 to $290 painted and stained, plus $100 to $300 for cushions and pillows
- Best time to build: now, on a dry fall weekend while days still reach 50°F, so the paint can dry. It's ready for cool evenings this fall, and done before searches for cinder block benches climb again at the end of February.
Jump to a section
- How the Cinder Block Bench Goes Together
- What You Need, and What It Costs
- Step 1: Set Two Level Pads
- Step 2: Glue and Stack the First End
- Step 3: Build the Second End and Line Them Up
- Step 4: Paint the Blocks
- Step 5: Stain the 4x4s
- Step 6: Slide the 4x4s Through
- Step 7: Add the Cushion and Pillows
- The Mistakes That Make It Fail
- Keep It Comfortable: Rain, Winter and Touch-Ups
- FAQ
If you buy one thing
The One Buy That Makes It Comfortable
A deep outdoor cushion, about 24 inches deep and 4 inches thick, turns six bare 4x4s into a seat you can sink into. It fixes the top complaint about these benches, so buy it first and space the ends to fit it.
How the Cinder Block Bench Goes Together

Nothing is screwed together. Two short stacks of glued blocks hold six long 4x4s, and the 4x4s hold the stacks in line.
- Each end is five blocks. Two sit on the bottom, holes up. Two lie on their sides on top, holes facing along the bench. One stands on its end at the back.
- Four 4x4s slide through the side-facing blocks and make the seat. Two more slide through the standing block and make the back.
- The holes in a standard block are about 5 inches across. A 4×4 is about 3 1/2 inches, so it slides through with room to spare.
The seat is deep and low, like a small outdoor sofa. It's about 25 inches from the front edge to the back rails. The wood sits about 12 1/2 inches off the ground, and a 4-inch cushion brings the seat to about 16 1/2 inches.

What You Need, and What It Costs

- Concrete blocks: 10 standard 8 x 8 x 16-inch blocks with two holes. Many people call them cinder blocks.
- Pressure-treated 4x4s: 6 of them, 8 feet long, with "Ground Contact" on the end tag.
- Concrete pavers: 4 of them, about 16 x 16 inches, for two level pads, plus 3 bags of all-purpose sand.
- Landscape block adhesive: 2 or 3 tubes. It's made to glue concrete outdoors.
- Caulking gun to squeeze out the glue.
- Exterior masonry paint: 1 gallon, tinted at the paint counter. The video uses a soft sage green.
- Exterior wood stain: 1 gallon, in a honey tone.
- Paint roller kit with a tray, plus a small brush for the holes.
- Outdoor deep seat cushions, about 24 inches deep: three 24-inch squares, or one long cushion of about 72 inches.
- Two outdoor throw pillows for your back.
- Tools: a spade, a 2-foot level, a tape measure and work gloves.
- Optional: outdoor string lights for the fence behind it.
What it costs: about $230 to $290 for the bench, painted and stained, at prices we found at US stores on October 7, 2026. The blocks and 4x4s that make the bench are about $80 to $95 of that. Cushions and pillows add about $100 to $300, depending on the fabric.
Two buying tips:
- Buy the cushions first. Then set the ends so the gap between them is the cushions' length plus about an inch (69 to 75 inches). The 8-foot 4x4s then stick out 3 to 6 inches at each end, and you never cut a board.
- Pick 4x4s with "Ground Contact" on the end tag. Water and leaves collect in block holes, and the treated-wood standard calls for ground-contact wood in spots like that, as the Southern Forest Products Association explains. A tag that also says KDAT (kiln-dried after treatment) means you can stain it the same day.
Step 1: Set Two Level Pads

- Choose a flat spot. Once the glue sets, the bench stays where you build it.
- Lay out two pads with about 5 1/2 feet between them. Each pad is two pavers, one behind the other.
- Dig out each pad with a spade, about 2 inches deeper than the pavers are thick.
- Spread 2 inches of sand in each hole, pack it down, and set the pavers flush with the lawn.
- Lay a 4×4 across both pads with the level on top. Add or scrape away sand until they're level with each other, then check each pad front to back.
Watch out: blocks set straight on grass sink unevenly, and the bench starts to rock. Level pads stop that, and pads flush with the grass let the mower roll right over them.
Step 2: Glue and Stack the First End

- Put on gloves, and keep the glue away from flames and sparks. It's flammable until it cures.
- Set one block on the first pad, holes up. Put a bead of glue on its back end, and push a second block against it.
- Run a zigzag bead of glue along the top of both blocks, about 2 inches in from the edges.
- Lay two blocks on their sides on top, glued end to end, with their holes facing along the bench. This is the seat row.
- Glue the top of the back seat-row block, and stand one more block on its end there, flush with the back. Its holes face along the bench, too.
Watch out: each block weighs about 30 to 40 pounds. Bend at the knees and keep the block close to your body, as OSHA advises.
Step 3: Build the Second End and Line Them Up
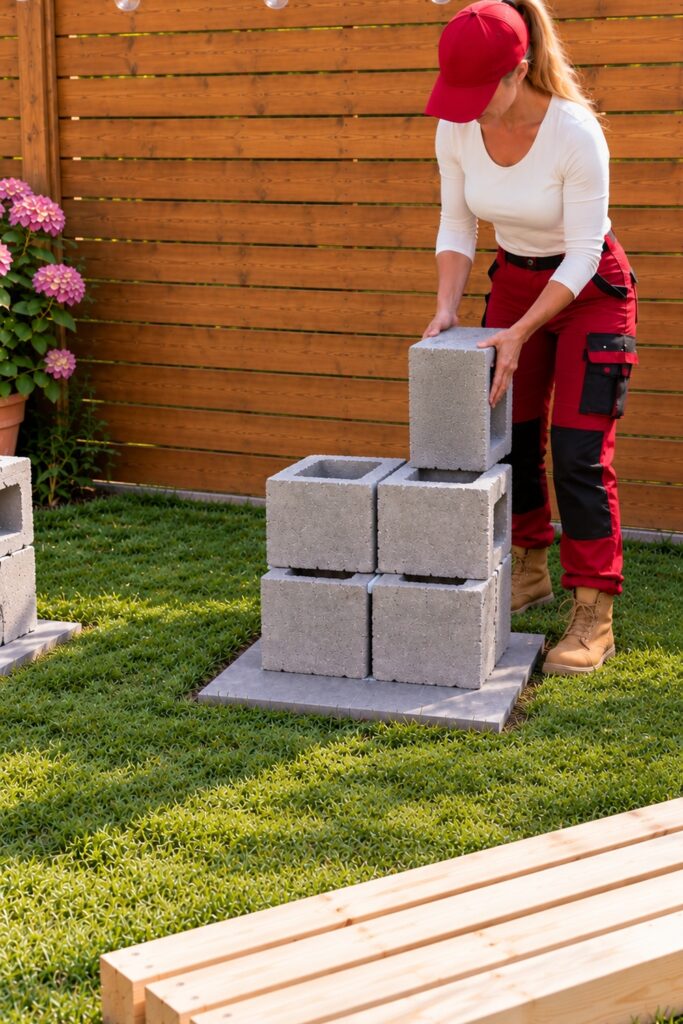
- Stack the second end the same way on the other pad.
- Set it so the gap between the two ends is your cushions' length plus about an inch.
- Right after the seat row goes on, slide one 4×4 through the seat rows of both ends. Nudge the blocks until it slides easily.
- Add the back block, and test the same way through both back blocks. Then pull the test 4x4s out.
- Leave everything alone for 24 hours while the glue sets.
Watch out: the glue lets you move a block for only about 5 minutes, so test-fit the 4×4 right away.
Step 4: Paint the Blocks

- Wait for a dry day between 50 and 90°F, the range on a common masonry paint.
- Brush off any dust, then roll paint onto every face you'll see.
- Brush paint just inside the hole openings, where gray would peek out around the wood.
- Roll on a second coat about 4 hours later, or when the can says.
Watch out: don't paint the blocks before you glue them, because the glue grips clean, bare block. Paint after the glue and before the wood, and you never have to paint around a 4×4.
Step 5: Stain the 4x4s

- Sprinkle a little water on each 4×4. If it soaks in within 10 minutes, the wood is ready for stain.
- Lay the six 4x4s on the grass, and brush stain on the top and both sides.
- Let it dry, then turn them over and stain the last side and the ends.
Watch out: if the water beads up, the wood is still wet from its treatment, and stain won't soak in. Slide it in bare and stain it in a few weeks. The treatment already protects it from rot.
Step 6: Slide the 4x4s Through

- Slide four 4x4s through the seat-row holes, all the way from one end to the other.
- Slide the last two through the back blocks.
- Center each one, so the same length sticks out at both ends.
Watch out: sitting is fine after a day, but wait up to a week before anyone leans back. The glue's maker gives it 2 to 7 days to reach full strength, and longer in cool weather.
Step 7: Add the Cushion and Pillows

- Lay the cushions on the seat, pushed back against the lower back rail.
- Stand the two pillows against the back rails, one at each end.
- If you're adding string lights, hang them on the fence. Plug them into an outdoor GFCI outlet with a cover.
Then sit down. That first sink into the cushion is the moment it stops being a pile of blocks.
The Mistakes That Make It Fail
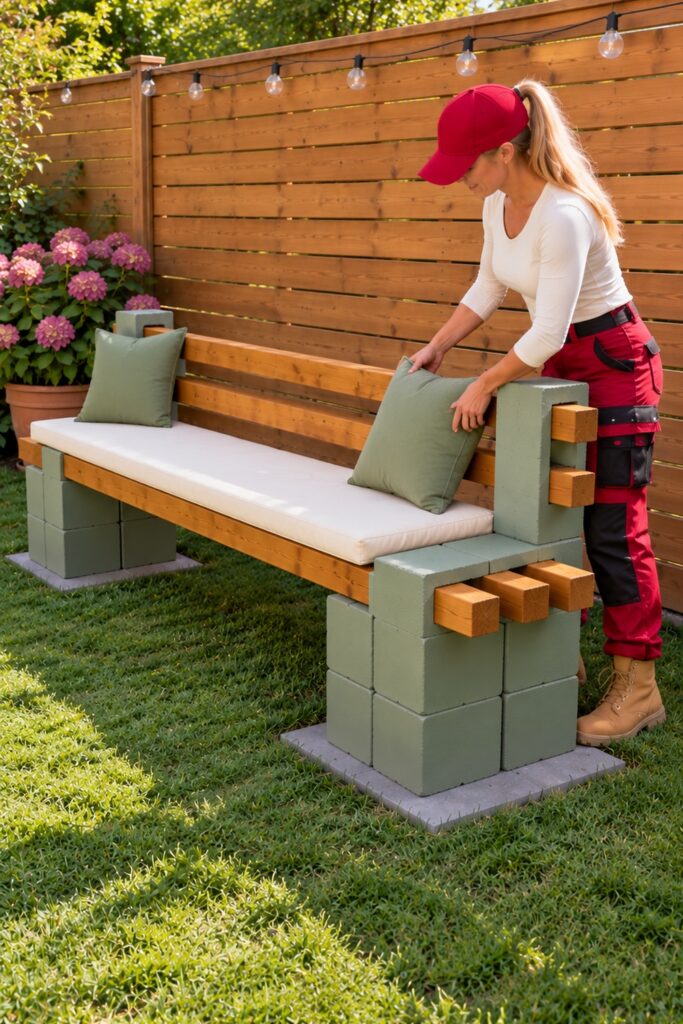
These five complaints come up again and again under cinder block bench videos, and each one has a simple fix:
- No cushion. Bare 4x4s with gaps between them are why people call it a "torture rack." Build the bench around a deep outdoor cushion.
- Blocks on bare grass. They sink, rock and lean, and you can't mow up to them. Set them on level pads, flush with the lawn.
- A back held on by glue alone. Run the back rails through the standing blocks, and let the glue cure before anyone leans back.
- Painting after the wood goes in. Glue, paint and stain first, and only then slide the wood in.
- Pricey timbers. People say the 4x4s cost a fortune. Plain pressure-treated pine keeps the blocks and wood under $100.
Get those five right, and you get the bench in the picture above. It's a deep, soft seat that nobody would guess started as a pile of blocks.
Keep It Comfortable: Rain, Winter and Touch-Ups
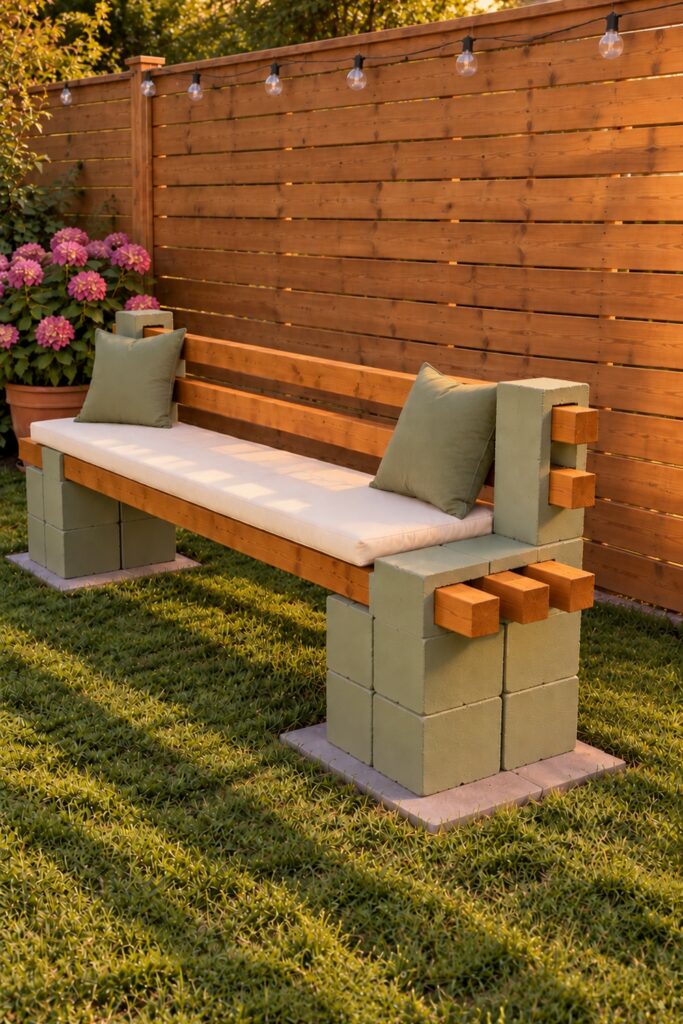
- Rain: bring the cushions and pillows in, or keep them in a deck box. If they get soaked, stand them on one edge so the water drains out.
- Wood: each spring, sprinkle water on the seat. When it soaks in instead of beading up, brush on a fresh coat of stain.
- Leaves: in fall, pull leaves and dirt out of the block holes, so the wood can dry.
- Winter: the blocks and ground-contact 4x4s can stay out all year. Store the cushions inside, clean and dry. Nothing is screwed in, so you can slide the 4x4s out for winter, too.
Then light the string lights, pull a blanket over your knees, and wait for the first friend to ask, "Are those really cinder blocks?" If you'd like the sound of water out there too, the floating faucet fountain is an afternoon build for the same yard.
Watch this build, and the next ones, on YouTube, Instagram and Facebook.
Start here
Want to sink into it on the last mild evenings this fall? Start with the cushions: the whole bench is spaced to fit them.
FAQ
How Many Cinder Blocks Do You Need for a Bench?
Ten for this bench with a back: five at each end. Without the back, eight blocks and four 4x4s make a simple bench.
What Glue Holds Cinder Blocks Together?
A construction adhesive made for landscape blocks, in a tube for a caulking gun. It works outdoors, lets you move a block for about 5 minutes, and reaches full strength in 2 to 7 days.
Do You Have to Glue a Cinder Block Bench?
A simple bench can stand on its own weight. With a back, glue every layer. People lean on a back, and loose blocks can slide.
What Size Wood Fits in Cinder Block Holes?
4x4s. A standard block's holes are about 5 inches across, and a 4×4 is about 3 1/2 inches.
Will a Cinder Block Bench Tip Over?
It's hard to tip. Each end is about 31 inches deep at the base, the ends sit on level pads, and six 4x4s tie them together. Still, don't let kids climb on the back.
How Much Does a Cinder Block Bench Cost?
About $230 to $290 painted and stained, at US store prices we checked on October 7, 2026. Cushions and pillows add about $100 to $300.


