
Peel and Stick Tile: the Five Ways It Fails, and How to Stop Each One

Peel and stick tile does not fail randomly. It fails in five ways, each one has a single cause, and every cause is something you decide before you open the box — usually in the first ten minutes, standing on the floor you are about to cover.
So this is not a list of pretty installations. It is the five failure modes, what causes each, and the one decision that prevents it. If you only read one section, read the surfaces section: the surface underneath decides four of the five.
Peel and stick tile fails in five ways, and each one has a single cause

Here they are together, because seeing them at once is what stops you buying the wrong thing:
- Corners lift. Cause: the surface was textured, dusty, or slightly damp.
- Every bump shows through. Cause: the tile is thin vinyl, roughly 0.3 to 0.5 mm, and it takes the shape of whatever is under it.
- Gaps open at the seams. Cause: the tile was cold when it went down and shrank back as the room warmed.
- It pulls the paint or the finish off. Cause: it was stuck to paint or to a porous surface, and the adhesive bonded better than the paint did.
- It slides or softens. Cause: heat — direct sun through a slider, a radiant floor, the wall right beside a stove.
Nothing on that list is bad luck. Each one is a surface, a temperature, or a thickness you chose.
Failure 1: the corners lift within weeks
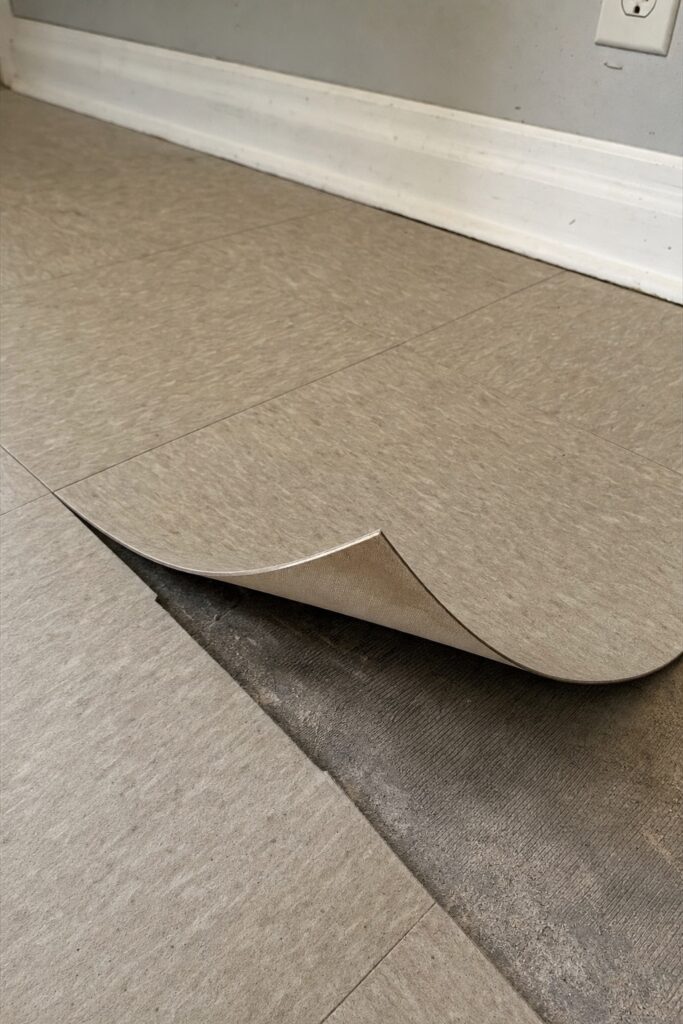
Lifting corners are a surface problem, not a product problem. Adhesive needs a smooth, clean, dry, non-porous surface to grip — sealed concrete, sheet vinyl, finished wood, primed drywall. On anything textured, dusty, waxy or slightly damp it holds for a few weeks and then releases at the edges, where the peeling force is highest.
Do the test before you buy: press a strip of packing tape onto the floor, leave it an hour, then pull it up. If it lifts with no resistance or comes away with a film of dust on it, the tile will do the same. Clean with a degreasing cleaner, let the surface dry fully — a bathroom floor after a shower is not dry — and only then start.
The other half of the fix is pressure. Every manufacturer's instructions say to roll or press each tile hard, and most people press with their hands and move on. Use a rolling pin if you don't have a floor roller, and do the edges twice.
Failure 2: every bump underneath shows through
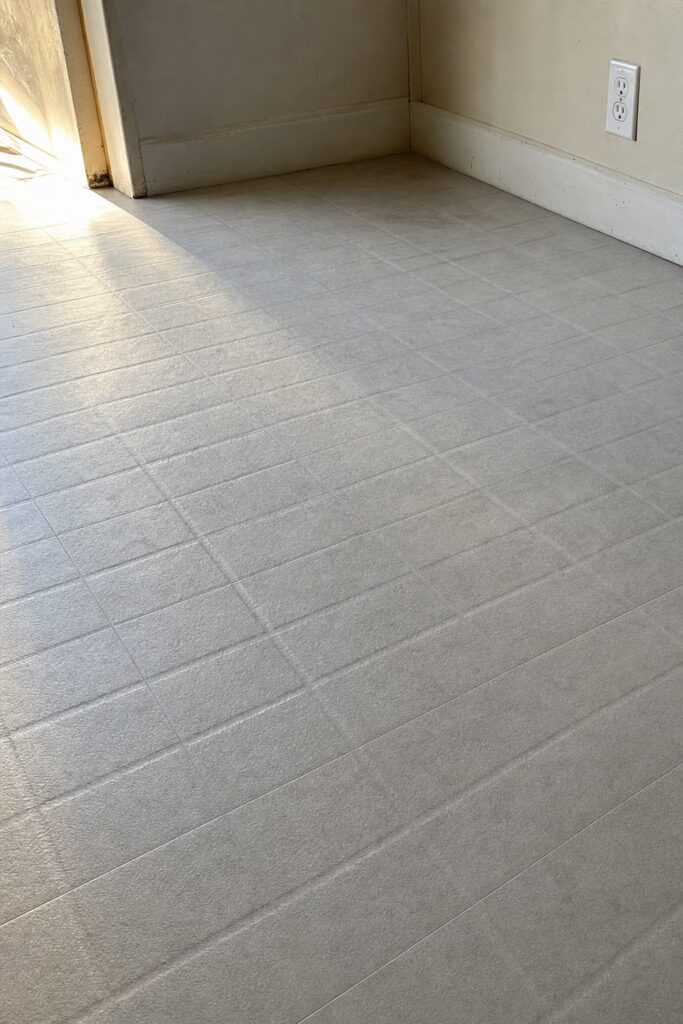
This one is called telegraphing, and it is the reason a floor can be perfectly stuck and still look wrong. Peel and stick vinyl is about 0.3 to 0.5 mm thick. That is thinner than a credit card, so every grout line, every ridge, every grain of sand under a tile prints through to the surface within a month of being walked on.
The decision that prevents it happens before you buy: over existing tile with grout lines deeper than about a credit card's thickness, thin vinyl will show every line. Either skip peel and stick there, or move up to a rigid SPC tile — a limestone-and-plastic composite, 4 to 10 mm thick — which bridges small irregularities and is genuinely waterproof, at several times the price and with a real height difference at doorways.
The cheap middle path is to fill, not to hope. A skim of floor patch over grout lines, sanded flat and fully cured, gives thin vinyl the smooth surface it needs. It is a Saturday, and it is the difference between a floor that looks new and one that looks like the old floor in a costume.
Failure 3: gaps open at the seams
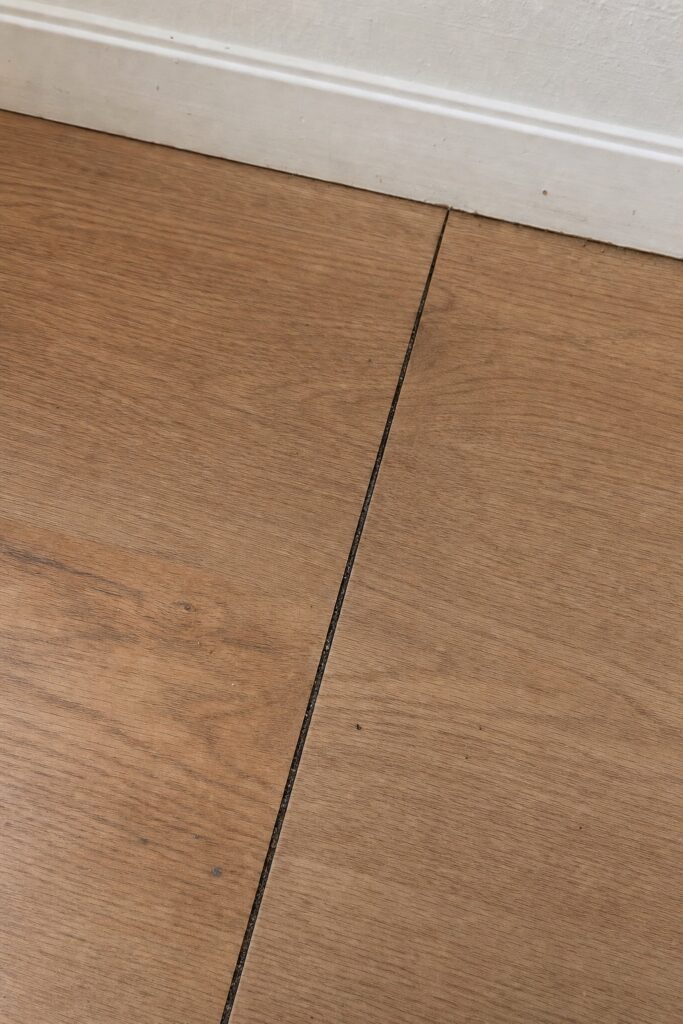
Vinyl moves with temperature. Tiles laid cold expand as the room warms, then contract again in winter, and by February there is a hairline gap at every seam that collects dirt and turns dark.
The prevention is the least glamorous instruction on the box and the one everyone skips: lay the unopened packs flat in the room for 48 hours at 65°F or warmer before you start, and keep the room at that temperature while you work. Manufacturer install guides — FloorPops' own instructions are typical — say exactly this. Tiles stacked in a cold garage the night before are already a bad floor.
Two more things widen seams: cutting tight against a wall with no expansion room, and starting from a corner instead of the center. Start from the center of the room, work outward, and leave the small perimeter gap the instructions ask for — the baseboard or a bead of caulk covers it.
Failure 4: it takes the paint or the finish with it

Removal damage is the failure that costs money, and it is almost always a surface choice made months earlier. Stuck to sealed vinyl, sealed concrete or finished hardwood, quality peel and stick usually comes up with heat and patience. Stuck directly to painted drywall or to a porous, unsealed surface, the adhesive can bond to the paint better than the paint is bonded to the wall — so the paint comes off with the tile.
The fix costs a few dollars: put something removable between the tile and the surface you care about. On walls, that means testing one tile in a hidden spot and leaving it a full week before committing. On floors, it means checking whether the existing vinyl is sealed rather than worn matte.
When the day comes, do not pull cold. Warm each tile with a hairdryer, lift a corner slowly at a shallow angle, and take adhesive residue off with an adhesive remover rather than a scraper. Our guide to rental decorating hacks sorts this kind of change by exactly what it costs you when you leave.
Failure 5: it slides or softens near heat

Adhesive is temperature-sensitive by design — that is how it sticks at all. Above roughly body temperature it softens, and a softened tile creeps: it slides a millimeter at a time under a chair leg, or bubbles in the stripe of afternoon sun that comes through a patio door.
Three places to avoid outright: over a radiant-heated floor (manufacturers exclude it, and it is the one place the heat is constant and unavoidable), a strip of floor in direct summer sun, and the wall immediately beside or behind a stove. We wrote the kitchen version of that rule in detail in our peel-and-stick backsplash guide, including the clearance to keep from a gas burner.
If the sunny strip is unavoidable, that is what a blind or a rug is for — and it is a reason to choose SPC, which does not depend on a pressure-sensitive adhesive in the same way.
The surfaces it holds on to, and the ones it will not
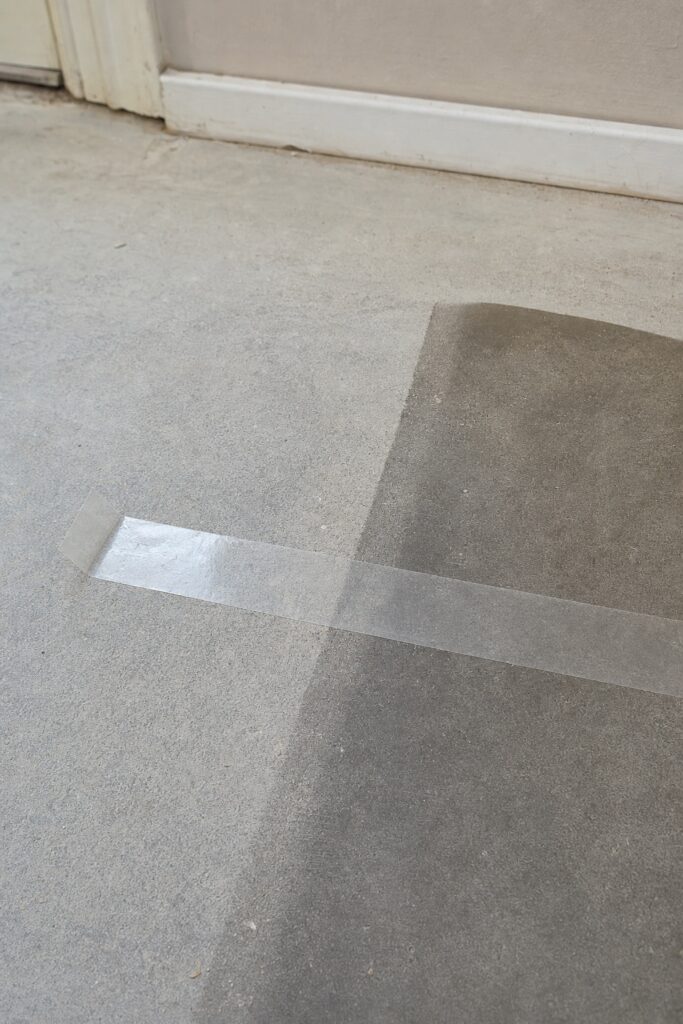
The short version: smooth, clean, dry and non-porous holds. Textured, dusty, damp, porous or freshly painted does not.
Reliable: sealed concrete, sheet vinyl in good condition, finished hardwood or laminate, primed and cured painted drywall, existing tile with shallow, flat grout lines.
Unreliable: textured or orange-peel walls, unsealed concrete, raw plywood, cushioned vinyl that gives under pressure, anything waxed or polished, tile with deep grout lines, and paint applied within the last month — fresh paint keeps curing for weeks, and adhesive on uncured paint takes the paint with it.
Two conditions matter as much as the material. The surface must be dry all the way through, not just dry to the touch, and it must be free of the invisible film that cleaning products leave — most instructions specifically name grease, wax and oils. Wash, rinse, dry, then test with tape.
Where it belongs, room by room

Peel and stick earns its place in small, low-traffic, low-moisture floors where the alternative is living with something genuinely ugly for three years. It is a poor choice for a whole open-plan floor, for anywhere wet enough to stand water, and for a room you cross fifty times a day.
Walls are their own case, and the kitchen version has its own article; below are the two floor jobs it does best.
The bathroom floor

A small bathroom floor is the classic win: the area is tiny, the existing floor is often the ugliest thing in the apartment, and the whole job is one afternoon and one box.
The moisture caveat is real, though. Water that sits — around the base of a toilet, along the tub edge, at the shower door — will find the seams and lift them from underneath. Run a thin bead of clear silicone along the tub edge and around the toilet base, keep a slatted mat rather than a rubber-backed one so the floor can dry, and accept that this is a three-year solution, not a ten-year one. If you would rather spend the same money on something with a longer life, our small bathroom on a budget guide ranks the options by change-per-dollar.
A laundry corner or an entry

The other genuinely good use is a small square of floor that is already unloved: the strip in front of a stacked washer and dryer, a coat-and-shoes entry, the floor of a closet you turned into an office nook.
These spaces suit it because they are small enough to do properly, visible enough to be worth it, and forgiving about wear. Two cautions specific to laundry: never run tile under the machines themselves — the point load of a full washer will dent thin vinyl and the machine has to be pulled out to fix it — and stop the tile at a clean line where the appliance sits. A washer that leaks onto a peel and stick floor is also a lifting problem, so check the hoses before you tile, not after.
Renting: plan the removal before you stick anything

Ask, in writing, before you buy — especially for floors. A landlord who says yes in an email costs you nothing; a landlord who finds out at move-out sets the price themselves.
Then set up the removal on day one, while it is easy:
- Test one tile in a hidden corner and leave it a week, then take it up and look at what came with it. That single tile is the entire risk assessment.
- Keep the leftovers and the box — matching a discontinued pattern in two years is not a thing that happens.
- Photograph the original floor before you cover it, in daylight, so there is no argument about what it looked like.
- Budget an afternoon and a hairdryer for taking it up, plus an adhesive remover. Removal is slower than installation, always.
Do those four things and peel and stick is a genuinely low-risk way to make a rented room look decent. Skip them and it becomes the most expensive $60 you ever spent on a floor.
FAQ
Does peel and stick tile damage the floor underneath?
It depends entirely on what is underneath. On sealed vinyl, sealed concrete or finished hardwood, good-quality tile usually lifts with heat and patience and leaves adhesive residue rather than damage. On unsealed, porous or freshly painted surfaces the adhesive can bond better than the finish does, and the finish comes up with the tile. Test one tile in a hidden spot and leave it a week before you commit to a room.
Can you put peel and stick tile over existing tile?
Yes, if the grout lines are shallow and flat. Thin vinyl is only about 0.3 to 0.5 mm thick, so any grout line deeper than that will telegraph through within weeks of being walked on. Either skim the grout lines with floor patch and let it cure fully, or use a rigid SPC tile, which is 4 to 10 mm thick and bridges small irregularities.
How long does peel and stick flooring last in a rental?
Realistically, the length of a normal one-to-three-year lease in a small, low-traffic, low-moisture room. Heat, standing water and the quality of the surface preparation are what shorten it. It is not a permanent floor and the ones that fail early nearly always failed at preparation rather than at the tile.
Do I really need to let the tiles sit in the room for 48 hours?
Yes, and it is the single most-skipped instruction. Vinyl expands and contracts with temperature; tiles laid cold shrink back as the room warms and open a hairline gap at every seam. Lay the unopened packs flat in the room for 48 hours at 65°F or warmer, and keep the room at that temperature while you work.
Can peel and stick tile go in a bathroom or over a heated floor?
A small bathroom floor, yes, with silicone along the tub edge and around the toilet base and no rubber-backed mat trapping water on top. A heated floor, no — manufacturers exclude radiant heat because the adhesive softens, and a softened tile creeps and lifts.
What should I do first before buying any?
The tape test. Press packing tape onto the surface, leave it an hour, pull it up. If it lifts easily or comes away dusty, the tile will too, and no product on the shelf will fix that. That five-minute test saves more failed floors than any brand choice.


