
Repurposed Furniture Ideas: 21 Ways to Reuse the Old Piece You Already Own


That honey-oak hutch from the thrift store, the dresser you inherited, the bed frame waiting in the basement: each one can take on a new job in your home. The 21 repurposed furniture ideas below are sorted by the piece you already own, each marked with its effort: an afternoon, a weekend, or a bigger build with a saw.
This guide contains Amazon affiliate links. As an Amazon Associate I earn from qualifying purchases, at no extra cost to you.
Before you paint or cut anything, do three quick checks (they come right after the ideas). They decide whether you paint the piece, strip it or leave the old finish alone, and one of them keeps lead dust out of your house.
Jump to a section
If you buy one thing
Start With a Shellac-Based Primer
Old oak and mahogany can push a yellow or pink stain up through light paint, and old drawers often smell musty. A shellac-based primer like Zinsser B-I-N seals in both, and it sticks to an old glossy finish without sanding. Brush it on before your color.
Dresser Ideas
The dresser is the piece most of us already have, and it's the most flexible one. Drawers come out, the top can be replaced and the box underneath can become a pantry, an island or a bench.
1. A Two-Tone Dresser With a Bare Wood Top


Effort: a weekend.
If your dresser is solid wood with a pretty grain (Check 1 below shows how to tell), don't paint all of it. Strip or sand the top back to bare wood (only after a clear lead test, Check 2), seal it with a clear satin finish, and paint the body and drawers a muted color like olive, sage, navy or warm white. The bare top keeps it looking like real wood furniture, and the paint makes it look new.
New knobs finish the look. Check the old pulls first: if they used two screw holes and your new knobs use one, fill the extra holes with wood filler before you paint.
2. Open Pantry Shelves Where the Drawers Were

Effort: an afternoon.
Take out the top two drawers, set a shelf board in the opening and fill it with baskets and glass jars of pasta, oats and rice. The bottom drawers keep their old job for dish towels and foil. Painted creamy white, it reads as a farmhouse pantry in a kitchen corner or a dining nook.
Measure the opening's height and depth before you buy baskets. They slide in and out like drawers, so they need about an inch of room above them.
3. A Kitchen Island on Locking Casters

Effort: a bigger build.
A long, low dresser makes a kitchen island with the storage already built in. Most U.S. kitchen counters stand about 36 inches tall, and most dressers sit lower, so the island gets its height from two additions: a thick butcher-block top and locking casters. Measure your own counter and the dresser before you buy either one.
Locking casters let you roll the island aside to mop. Lock all four wheels before you chop anything. No dresser to spare? Our pallet kitchen island builds one from scratch.
4. An Entry Bench From the Bottom Half

Effort: a bigger build.
A long dresser can give a small entry a seat, shoe storage and a spot for keys in one piece. Cut one end down to seat height, keep a stack of drawers at the other end as a side cabinet, and top the seat with a board and a cushion.
To find the right seat height, measure the seat of one of your dining chairs and cut to match. More ways to make a small entry work are in our small entryway ideas, and our crate shoe bench is the build-from-scratch version.
5. A Bathroom Vanity With a Bowl Sink

Effort: a bigger build, plus a plumber for the drain.
A dresser with a vessel sink on top gives a plain bathroom the look of a custom vanity. The bowl sits on top of the dresser and adds its own height, so set it in place and check the rim height before you cut the hole for the drain.
Water is the enemy here. Seal every wood surface, top and inside, with a water-resistant clear finish. The top drawer usually loses its back to make room for the pipes and becomes a shallow shelf for rolled towels. Leave the drain and supply lines to a plumber. Prefer to build one? See our pallet vanity.
6. Drawers Hung as Wall Shelves

Effort: an afternoon.
When the dresser itself can't be saved, keep the drawers. Paint each one a different soft color and hang them on the wall right side up, front facing out, so each drawer becomes a small open shelf that keeps its knob.
Screw each drawer to a wall stud through its back panel, with a strip of wood inside if the back is thin. Keep them for light things: paperbacks, small plants and flameless candles in glass holders (real flames don't belong in a wooden box full of books).
7. Rolling Under-Bed Drawers

Effort: an afternoon.
Screw four small casters to the bottom of a deep drawer and it rolls under the bed with sweaters, spare sheets or gift wrap inside. Measure the gap under your bed first: the drawer plus its casters has to fit with a little room to spare.
Hutch and China Cabinet Ideas
A hutch is really two pieces stacked: a glass cabinet on top of a buffet. That's why it can take on so many jobs.
8. A Coffee Bar With Mugs on Hooks

Effort: a weekend.
Paint the hutch inside and out, screw a row of brass cup hooks under the lowest shelf and let the counter hold the coffee maker and a tray. The hooks are the part that makes it work: the mugs hang right where you reach for them. Everything for coffee lives in one corner instead of spreading across the kitchen counter.
Set the hooks a few inches back from the front edge so the hanging mugs clear the doors, and check that an outlet sits within reach of the coffee maker's cord. A tall hutch gets anchored (Check 3). For more layouts, see our small coffee bar ideas.
9. Two Pieces From One: A Wall Cabinet and a Sideboard

Effort: a weekend.
Many hutches are two sections that lift apart. Look inside the top for the screws or brackets that hold it to the base. Hang the top section on the wall as a glass cabinet and keep the base as a low sideboard. In a small dining room, a low piece with a cabinet above it feels lighter than one tall block.
The top section is heavy. Lift it off with a second person, and hang it on a French cleat (two strips of wood cut at an angle) screwed into the wall studs.
10. A Linen Cabinet for the Bathroom

Effort: an afternoon.
A narrow china cabinet with glass doors keeps towels in sight and out of the steam. Rolled towels look neat through glass, and jars of cotton balls fit on the narrow shelves.
Bathrooms are damp, so give the wood a fresh coat of paint or a clear finish and run the fan after showers. Anchor it like any tall piece.
Bed and Crib Ideas
Old beds have the best shapes for benches and shelves: tall headboards, turned posts and carved tops.
11. A Headboard and Footboard Bench


Effort: a bigger build.
The headboard becomes the back, the footboard is cut in half for the two arms, and a plank seat ties them together. Painted white with a cushion and two pillows, it turns a bed nobody sleeps in into the best seat on the porch.
Don't trust old bed rails to carry people. Build the seat on a new frame of 2x4s screwed into the headboard and footboard posts. If the bench lives outside, seal every surface and keep it under the porch roof.
12. A Headboard Plate Shelf With Mug Hooks

Effort: a weekend.
A headboard with turned posts hangs on a kitchen wall as a shelf. Add a plank on top for plates standing in a row and a line of cup hooks along the rail below.
Headboards are heavy, so screw into at least two wall studs. Cut a shallow groove in the plank or add a thin strip along its front edge so the plates can't slide off.
13. A Crib Turned Garden Bench
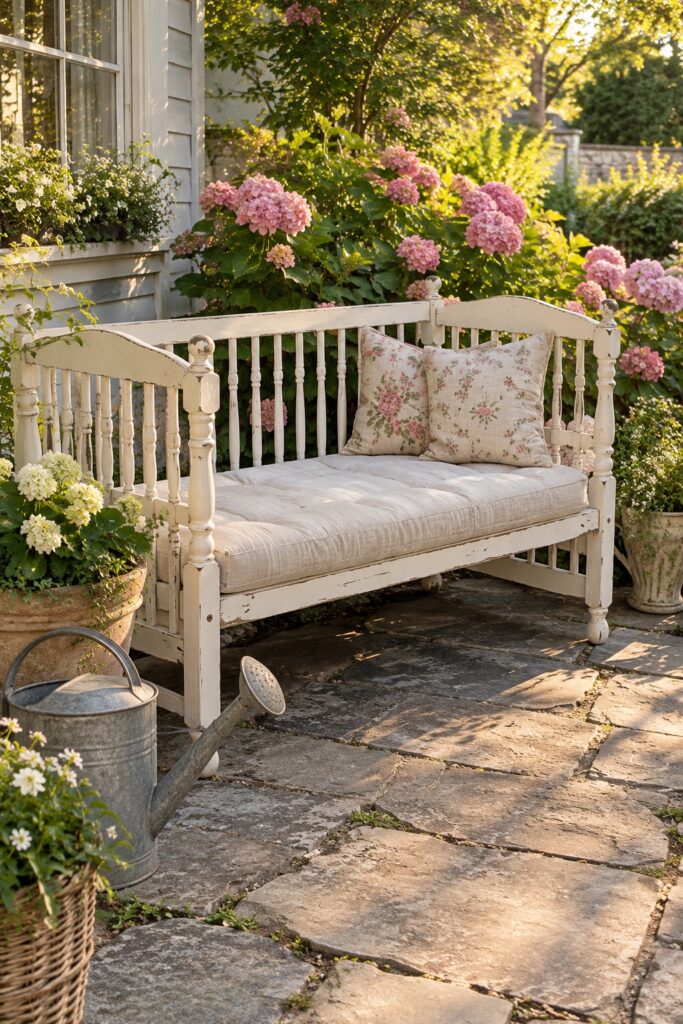
Effort: a weekend.
Old drop-side cribs haven't met the federal crib standard since 2011, so they shouldn't be resold, donated or given away. Turning one into a bench gives it a better ending than passing it on to a new baby.
Take off one long side, lower the seat to bench height and add a cushion. A crib was never built to hold an adult, so set the seat on a new 2×4 frame screwed to the corner posts.
Door and Ladder Ideas
Old doors and ladders are mostly flat, sturdy wood, which makes them easy to turn into storage. Test any old door paint first (Check 2): doors rub and bump every day, so worn paint on them can turn into dust.
14. An Old Door Hall Tree

Effort: a bigger build.
Stand an old paneled door upright against the wall, add coat hooks across an upper panel, a small shelf on top and a bench box at the bottom. It puts a whole mudroom into the width of one door.
A door loaded with coats is tall and top-heavy, so screw it to the wall studs at the top. Find more ideas for the space by the door in our entryway ideas.
15. A Corner Shelf From Two Doors

Effort: a weekend.
Two narrow doors joined at a right angle make a corner bookcase for an empty living room corner. Triangle shelves fixed between them hold the doors square and give you room for books, a plant and a small lamp.
Keep the old glass knobs for charm. Anchor both doors to the wall at the top.
16. A Ladder Blanket Rack
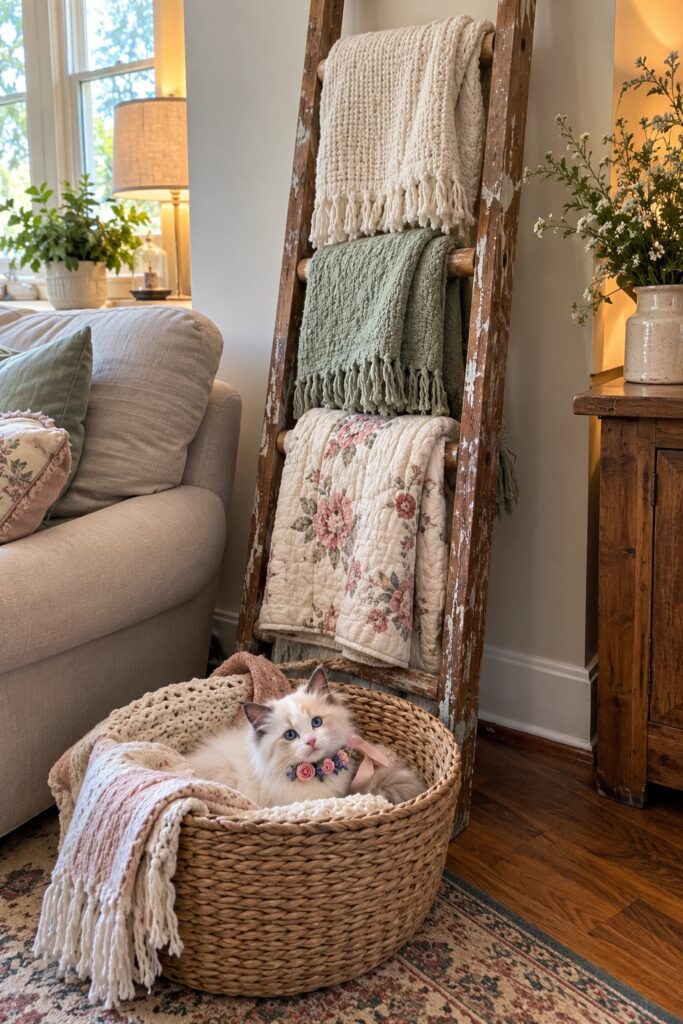
Effort: an afternoon.
An old wooden ladder leaning against the wall holds throws and quilts right where you need them, next to the sofa. Paint splatters and worn rungs are the charm, so clean it and leave the finish alone (after a lead test if the paint is old).
Fix the top to the wall with a small bracket so it can't slide when someone pulls a blanket. Once it's decor, it stays decor: don't climb it.
Table, Chair and Small-Piece Ideas
Small pieces are the quickest wins: four of these five take one afternoon, and the cut-down table takes a weekend.
17. A Coffee Table Cut From a Dining Table

Effort: a weekend.
An old farmhouse dining table with thick legs makes a coffee table that looks like it has always been there. Measure the height of your sofa seat and aim for a table at about the same height, so cups and books are easy to reach from the cushions.
Mark all four legs the same distance down from the tabletop, cut, and check for a wobble on a flat floor. If the legs are turned, cut below the shaped part so you keep it.
18. A Sewing Machine Base Console

Effort: an afternoon.
An old cast-iron treadle base plus a new wood plank top makes an entry console or a small desk. The iron is heavy, so the table stands steady, and the open pattern looks pretty against a plain wall.
Tie the big wheel and the foot pedal in place with wire or a zip tie so they can't move when someone bumps them or little fingers explore.
19. A Chair Planter for the Porch

Effort: an afternoon.
A chair with a broken cane seat or a wobbly seat board still has a good frame. Take the seat out and drop a pot of flowers into the opening.
Choose a pot whose rim is a little wider than the opening, so the rim rests on the frame. Paint the chair with exterior paint so it survives the porch.
20. A Trunk Coffee Table

Effort: an afternoon.
An old steamer trunk is a coffee table with blanket storage inside. Clean it, rub a little conditioner into the leather handles and add felt pads under the corners to protect the floor.
If small children live with you or visit, add a spring-loaded lid support that holds the lid open in any position. It's the same advice given for toy chests, because a falling lid can trap a child.
21. A Suitcase Wall Shelf

Effort: an afternoon.
A hard-shell suitcase, opened and screwed to the wall, becomes a shelf with its own frame. Fit a thin shelf inside and it holds paperbacks, a small print and a tiny plant.
Suitcase shells are thin, so screw through the back into a stud and keep heavy books for a real shelf.
Three Checks Before You Paint or Cut
Picked an idea? Check the piece before you start. Each check takes a few minutes, and each one can change your plan.
Check 1: Is It Solid Wood or Veneer?

Pull out the top drawer and look at its front corners. Interlocking dovetail joints point to solid wood; staples and a particleboard back point to a cheaper build. Then look closely at the front edge of the top. On solid wood, the grain runs over the edge and shows end grain on the sides. Veneer shows a thin, perfectly straight line where a sheet of wood was glued over the core.
Veneer isn't bad news. Plenty of well-made older furniture is veneered, and it takes paint well. It just changes the plan:
- Solid wood with a pretty grain: keep the top bare and paint only the body (idea 1).
- Veneer in good shape: clean it, prime it and paint it.
- Veneer lifting at an edge: glue it down and clamp it overnight first, because paint won't hold a loose sheet in place.
- Particleboard swollen from water: skip it for anything that holds weight or sits near a sink.
Check 2: Was It Painted Before 1978?

Furniture made since early 1978 can't leave the factory with lead paint: that's when the federal ban on lead paint for furniture took effect. Older pieces, and pieces someone repainted at home with an old can, may have lead under the top layer. The Environmental Protection Agency (EPA) lists refinishing old furniture among the jobs that can put you in contact with lead.
So test before you sand, scrape or strip anything painted before 1978. Use lead test swabs made for wood (the EPA recognizes two brands, LeadCheck and D-Lead). A swab that keeps its color is a trustworthy "no lead".
If a swab changes color, treat the paint as lead: don't sand, scrape or heat it. Choose an idea that keeps the old paint as it is, send a paint chip to a certified lab for a firm answer, or hand the job to an EPA-certified renovation firm. Chipping old paint is the biggest worry around small children, so keep a piece like that out of their rooms.
Check 3: Will It Stand Tall? Anchor It

Anything tall with drawers, doors or shelves gets anchored to the wall. A dresser made before September 2023 never had to pass the federal tip-over test that new dressers do. Repurposing can also shift its balance: you pull the top drawers out for shelves, add a heavy wood top or load the upper shelves with books.
The Consumer Product Safety Commission's Anchor It campaign puts it plainly: anchoring furniture with drawers, doors and shelves to the wall prevents tip-over injuries and deaths. An anti-tip kit is a small set of brackets and a strap. Screw one bracket into a wall stud and one into the back of the piece, connect the strap and give it a tug. Hutches, tall dressers, door hall trees and ladder racks all count.
How to Paint Old Furniture to Last

Most painted furniture fails in one of three ways: the paint peels, the old wood bleeds through, or the top stays soft and sticky. This order prevents all three.
- Clean it. Wash it with a degreasing cleaner and water, then let it dry completely. Paint won't stick to years of furniture polish and kitchen grease.
- Fix it. Glue loose veneer, tighten wobbly joints and rub candle wax on sticky drawer runners.
- Scuff it lightly, only after a clear lead test. A light sanding gives the paint something to grip.
- Prime old wood with a shellac-based primer. Oak and mahogany can bleed a yellow or pink stain up through light paint. A shellac-based primer (Zinsser B-I-N is the best-known one) blocks that stain, seals in musty drawer smells and sticks to an old glossy finish without sanding. It smells strong, so work outside or with the windows open.
- Paint two thin coats. A thick coat drips and stays soft longer.
- Seal the top. Add a clear water-based topcoat on the top and the drawer fronts, the parts hands touch every day.
- Give it time. Paint feels dry in an hour or two, but furniture paint can take about two weeks to fully harden (check your can), so keep heavy lamps and stacks of books off the top until then.
Using chalk-style paint? It usually skips the sanding and often the primer, but not the bleed-through. On oak or mahogany, seal the wood with clear shellac first, and finish with wax or a clear coat so the paint doesn't chip.
Start here
Ready to paint? Start with a shellac-based primer: it stops the old wood's stain and the drawer smell before your color goes on.
FAQ
What Is the Difference Between Repurposed and Upcycled Furniture?
Repurposed furniture gets a new job, like a dresser that becomes a pantry. Upcycled furniture is made better or more valuable than it was, often with paint or new materials, even if it keeps its old job. Most of the makeovers on this page are both.
Should You Paint an Antique Dresser?
If it might be valuable (a maker's label inside a drawer, hand-cut dovetails, an original finish in good shape), ask an antiques dealer or an appraiser before you paint. Paint is hard to undo, and an original finish is often part of what an antique is worth. A 1980s or 1990s store-bought dresser is fair game.
Do You Have to Sand Furniture Before Painting It?
Not always. A shellac-based primer sticks to an old glossy finish without sanding (step 4 above). Clean the piece well either way. If the old paint could be from before 1978, don't sand it at all until a lead test comes back clear.
Where Can You Find Old Furniture to Repurpose?
Start at home: basements, garages and your family's spare rooms. Then try Habitat for Humanity ReStores, estate sales, thrift stores and Facebook Marketplace. Look for solid wood, dovetailed drawers and a sturdy frame. Skip pieces with swollen particleboard, a mildew smell that has soaked into the wood, or small holes with fresh wood powder under them, a sign of insects. Not sure a piece is worth saving? Our 30-day declutter challenge helps you decide what stays.
How Do You Get the Musty Smell Out of Old Drawers?
Empty the drawers, wash them with water and a little white vinegar, and let them dry in a sunny, airy spot. Leave an open box of baking soda inside for a few days. If the smell comes back, seal the inside with a coat of shellac-based primer, which blocks most odors, and let it air out for a few days before you fill the drawers.


