Peel and Stick Floor Tile: Where It Works, and How to Lay It Straight

Peel and stick floor tile has a split reputation — miracle weekend floor in one review, curled-up disappointment in the next — and the difference is almost never the tile. It's the room. A floor is the only surface in your home that gets walked on, rolled over, dripped on, and parked under appliances, so the honest question isn't "is this product good?"
but "can any adhesive tile survive what this room does to a floor?" This guide gates the rooms first, then covers the parts of the install that are unique to floors: the subfloor, the center-line layout that keeps rows straight, the roller, the toilet cut, and the habits that decide year two.
Jump to a section
- A floor takes abuse a wall never sees
- The room ladder: where floor tile wins
- Buy the floor class, not the pretty box
- The subfloor is the real project
- Snap two lines: the floor starts in the middle
- Press, then roll: the bond is a weight game
- Cuts, edges, and the toilet problem
- Wet rooms: the edges are the whole battle
- Feet, felt, and the no-drag rule
- Renting? Loose-lay beats adhesive
- The five-day rule and the spare box
- FAQ
A floor takes abuse a wall never sees
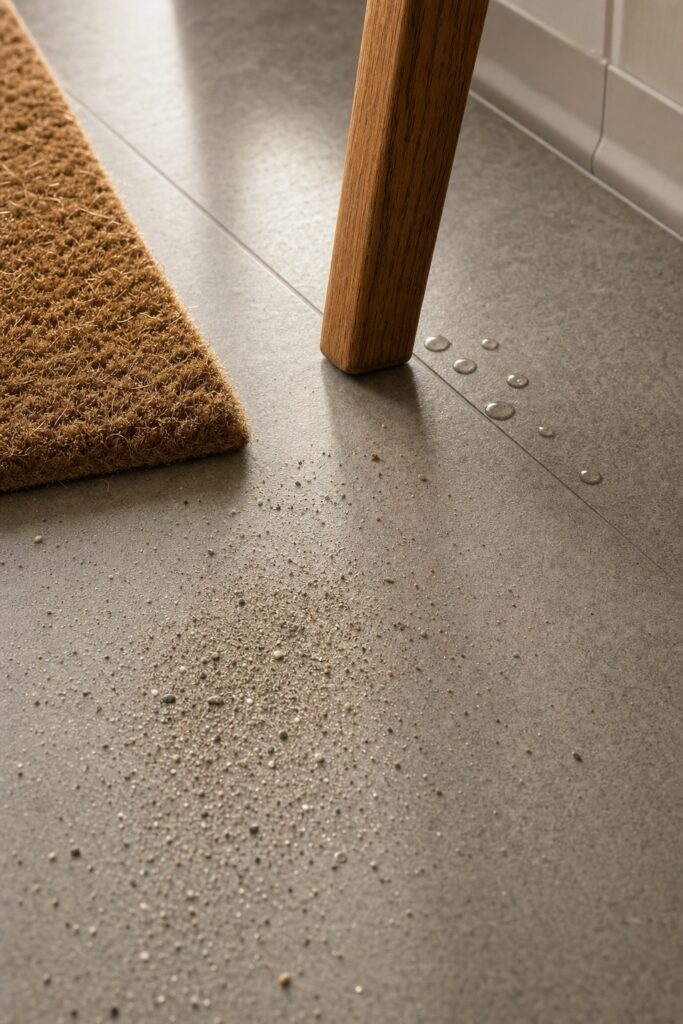
Three stresses separate floors from every other peel-and-stick surface, and they explain nearly every bad review.
Grit underfoot. Every footstep grinds tracked-in sand between shoe and tile — a slow sanding machine that dulls gloss finishes at the entry side of a room first.
Point loads. A chair legs concentrates a person's weight to the size of a dime; a refrigerator does that permanently in four spots. Adhesive tile takes the dent, and thin tile takes it fast.
Edge water. Splashes don't hurt vinyl — vinyl is waterproof. But water that reaches a seam or a wall edge finds the adhesive underneath, and adhesive that gets wet repeatedly lets go. The tile survives; the bond drowns.
Judge every room against those three, and the product reviews suddenly sort themselves: the five-star laundry rooms had none of the stresses, the one-star kitchens had all three.
The room ladder: where floor tile wins

Ranked by the three stresses, the rooms line up in a clear order. Laundry rooms, half baths, and pantries are the sweet spot: low traffic, no grit source, occasional water you can seal against — this is where peel-and-stick floors run for years. Full bathrooms come next: fine footing, small area, but the tub edge and toilet base demand the sealing discipline covered below. Kitchens are a maybe: heavy standing traffic and the fridge's point loads, plus the drag risk every time an appliance moves. Entries and mudrooms rank low — they're grit's home field. And living rooms and bedrooms usually shouldn't bother: big areas multiply cost past cheap remnant carpet or floating floors, and furniture point loads dot the whole room.
The pattern behind the ladder: peel-and-stick floors excel in small, sealed, low-grit rooms — which happen to be exactly the rooms whose ugly floors bother people most.
Buy the floor class, not the pretty box

Wall-rated and floor-rated peel-and-stick are different animals wearing the same packaging, and the difference is thickness and core. The thin, flexible vinyl that's perfect on a backsplash telegraphs every subfloor flaw and dents under chair legs; floor duty wants the thick, rigid class. We've broken down the material classes — and the five ways the product fails when they're mismatched — in our peel and stick tile guide, so the short version here: read the listing for the word "floor," pick the heavy rigid tile over the flexible film, and treat bargain no-name thin tile as a wall product no matter what the photos show.
One more buying rule from the room ladder: buy for the room's stress, not the room's photo. A delicate thin marble-look might be fine in the half bath nobody wears shoes into, while the mudroom needs the thickest boring option on the shelf.
The subfloor is the real project

Adhesive tile is a skin, not a structure — it shows what's under it and holds only as well as what it grips. Manufacturer LX Hausys puts the requirement plainly: the surface must be leveled, smoothed, and completely dry before a tile goes down, and on concrete a primer may be needed for a strong bond.
In practice, three subfloors cover most homes. Existing sheet vinyl or linoleum: usually the best base — degrease it, and if it has embossed texture, expect the pattern to telegraph through unless you skim it with embossing leveler. Old ceramic tile: the grout lines WILL print through thin tile; fill them level or use rigid-core product. Concrete: patch cracks, then prime raw surfaces — porous concrete drinks adhesive. Whatever the base, finish with a vacuum and an alcohol-and-water wipe, the same clean-surface rule that governs every adhesive project in the house. An hour of prep here buys years of bond.
Snap two lines: the floor starts in the middle

Walls get hung from a plumb line; floors get laid from the center, and for the same reason — the room's edges are liars. Start tiles against a wall and you inherit that wall's crookedness across every row, then discover at the doorway that you're finishing with a two-inch sliver everyone will see.
The fix is the classic method LX Hausys describes: snap two perpendicular chalk lines that intersect at the room's center, and lay the first tile at that intersection, working outward one quadrant at a time. Before peeling anything, dry-lay a full row in each direction: if the layout ends in a skinny sliver at a visible edge, shift your center line half a tile so the cuts land wide and even. Ten minutes of dry-laying is the difference between a floor that looks installed and a floor that looks applied.
Press, then roll: the bond is a weight game

Hand pressure sets a tile in place; weight sets it for years. The pros follow the laying pass with a floor roller — LX Hausys recommends one weighing 75 to 100 pounds — because pressure is what drives the adhesive fully into the subfloor's microscopic texture. For one small room, you don't need to rent equipment: a kitchen rolling pin leaned on with full body weight, run in overlapping passes, does honest work — and walking the whole floor slowly in soft shoes afterward adds more.
Butt each tile tight against its neighbor as you go. Gaps don't close later; they collect grit, and grit in a seam works like a crowbar underfoot.
Cuts, edges, and the toilet problem

Straight edge cuts are the easy ones: score the face with a fresh utility blade against a straightedge, snap along the score, done. Warm tile cuts better than cold — a few minutes over a heating vent makes stiff tile cooperative.
The bathroom's boss fight is the toilet base, and the answer is paper: press a sheet of kraft paper around the toilet's foot, crease the outline, cut the template, trace it onto the tile, and cut the curve with sturdy scissors or repeated knife scores. The same template trick handles door casings and pipes. Aim for a close-but-not-forced fit — a small consistent gap disappears under a bead of caulk, while a forced tile bows and lifts.
Wet rooms: the edges are the whole battle

Vinyl tile in a bathroom fails from the edges inward, so the edges get the attention. After the floor is down, run a thin bead of silicone along the tub line, around the toilet base, and anywhere the floor meets a wet fixture — you're not gluing the tile down, you're building a curb that keeps mop water and shower drips from ever reaching the adhesive layer. Recheck those beads once a year; silicone is a consumable, not a monument.
Two habits finish the job: wipe standing puddles rather than letting them sit on seams, and in a tiny full bath, drape the bath mat over the tub edge to dry instead of leaving it damp on the new floor — a permanently damp mat is a slow-motion edge-water attack.
Feet, felt, and the no-drag rule

Point loads are manageable; drag is fatal. Stick felt pads under every chair and table leg the same day the floor finishes — they spread the load and let feet slide instead of gouge. For heavy furniture, wide rubber-cup glides beat small felt dots.
The rule that saves kitchens: nothing heavy gets dragged, ever. A refrigerator pulled out for cleaning shears seams and bunches tiles in one motion. Walk heavy pieces onto a sheet of hardboard or plywood and slide the board, not the appliance. It's a two-minute precaution against the single most common way an otherwise-perfect vinyl floor dies in an afternoon.
Renting? Loose-lay beats adhesive

The rental version of this project skips adhesive entirely where it can. Loose-lay and floating vinyl planks — heavy enough to stay put by friction and weight, connected to each other rather than the floor — deliver the same visual over a landlord's dated floor and lift out at move-out leaving nothing behind. That's the default answer for a rented kitchen or bathroom; it's also the honest answer for any subfloor you're not allowed to prime, patch, or skim.
If you do use adhesive tile in a rental, apply the standard from our rental kitchen playbook: photograph the floor before, keep the receipt, and accept that removal from old sheet vinyl can pull the top layer — which is exactly the argument for loose-lay. A floor is the hardest surface in the apartment to un-stick; choose the version that never sticks.
The five-day rule and the spare box

Two habits at the finish line protect the whole project. First, patience: LX Hausys tells installers to let tiles settle for at least five days before any wet cleaning — the adhesive is still marrying the subfloor, and an early soaking interferes. Sweep freely; hold the mop till next week.
Second, keep a spare box. Peel-and-stick's best feature is that the floor is repairable one tile at a time: warm a damaged tile (hair dryer, low), lift it, clean the spot, press in a spare, roll it. A pattern discontinued two years from now can't be matched — but the box in your closet always matches. Label it with the room's name and the install date, and the floor becomes the rare budget project that's easier to maintain than the expensive version.
FAQ
Can I lay it over existing ceramic tile?
Yes, if you neutralize the grout lines first — either fill them flush with patching compound or choose a rigid-core product thick enough not to telegraph them. Lay a test tile over a grout line and check it in raking light before committing the room.
Does it work over radiant-heated floors?
Sometimes — adhesive and heat have a complicated relationship, and every maker publishes its own temperature rating. Check the specific product's documentation for radiant approval and the maximum floor temperature, and skip any product that doesn't state one.
How should I clean it?
After the five-day settle: sweep or vacuum regularly (grit is the enemy from the first section), then damp-mop with a neutral cleaner. Skip steam mops — heat plus moisture is aimed straight at the adhesive — and skip wax, which builds a film the next cleaning has to fight.
One tile got damaged. Do I redo the floor?
No — that's the format's superpower. Warm the damaged tile until the adhesive relaxes, lift it with a putty knife, clean the void, place a spare from your kept box, and roll it. Total repair time is about ten minutes.
How long does a peel-and-stick floor last?
In the room ladder's sweet spot — small, sealed, low-grit rooms over a properly prepped subfloor — years; makers commonly show installs going strong past the five-year mark. In a gritty entry or a dragged-appliance kitchen, months. The room and the prep set the lifespan; the tile mostly just reports their decision.