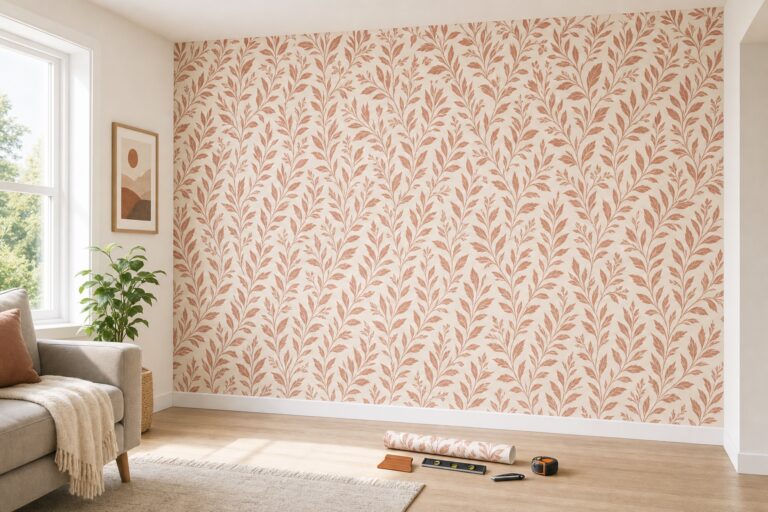
Peel-and-Stick Backsplash Ideas That Actually Look Real (and Come Off Clean)

A peel-and-stick backsplash can make a rental or budget kitchen look finished in an afternoon — no grout, no mortar, no contractor, no landlord phone call.
The catch is that "renter-friendly" only holds if you get two things right: the wall you stick it to and the heat near your stove. Get those right and it peels back off clean when you move. Get them wrong and you're patching paint — and if you rent, kissing your deposit goodbye.
So this guide does the looks and the honest part. First the rule that decides whether it's safe on your kitchen, then the tiles that actually pass for real, then how to put it up and take it back down without leaving a mark.
Jump to a section
The two rules that decide everything
Before you fall for a marble-look tile, answer these:
- Is your wall smooth? Peel-and-stick needs a clean, smooth, non-porous surface. Semi-gloss or satin paint, glass, and existing sealed tile hold beautifully. Flat/matte paint and textured "orange-peel" walls are where tiles bubble, lift at the edges, and — on flat paint — sometimes take a layer of paint with them.
- How close is your stove? Standard vinyl tiles are not made for direct heat. Right behind a burner they can discolor or curl. That zone needs different material and some clearance, covered below.
If your walls are smooth and your backsplash area isn't sitting inches from an open flame, you're a good candidate. If not, keep reading — there are fixes for both.

Will it damage the wall (or cost you the deposit)?
Short answer: it usually comes off clean — but the surface underneath decides the risk, not the marketing. Here's the honest ranking, safest to riskiest:
- Over existing tile, glass, or a sealed counter — safest. These are non-porous, so the adhesive lets go with a little heat and leaves almost nothing behind. This is the ideal low-risk surface: you're covering dated tile, not bonding to raw wall.
- Over semi-gloss or satin painted drywall — usually fine. The slicker paint gives a strong-enough bond to look good and still release. Clean, quick removal is the norm when tiles haven't been up for years.
- Over flat/matte or textured paint — riskiest. Matte paint is porous, so the glue grabs the paint instead of sitting on top of it, and it can pull paint off on the way down. Textured walls barely make contact, so tiles lift on their own. Manufacturers generally advise against matte and textured surfaces — a few renters report success, but this is where deposits get lost.

The other quiet risk is time. The longer tiles stay up, the more the adhesive cures into the wall, and the harder a clean removal gets. A one-year rental is very different from a five-year install.
Deposit-safe move: if you're unsure about your paint, test one tile in a hidden spot — inside a corner or behind the toaster — leave it a week, then peel it and check the wall.
The three types — pick by look and by where it goes
Peel-and-stick isn't one product. Three materials cover almost everything, and the right one depends as much on where it goes as on the style you want.
- Vinyl (flat, printed). The cheapest and most common. Thin, flexible, cuts with a utility knife, and comes in every pattern — subway, marble, cement, terrazzo. Best for a general backsplash away from direct heat. It's the "looks great on a budget" pick.
- Gel / 3D (raised, epoxy-coated). A clear domed coating over the print gives real depth and shine, so it reads as actual glass or ceramic tile up close — the most convincing look on camera and in person. It shrugs off water and wipes clean. Costs more than vinyl.
- Metal (aluminum or stainless-faced). Modern, industrial, and the durable one: it tolerates heat far better than vinyl, which makes it the smart choice for the strip directly behind a stove. Pricier and harder to cut, so people often use it just in the hot zone.
A simple way to choose: gel for the look, vinyl for the budget, metal for the heat.

Looks that actually work
Each of these is a complete, copyable look — not the same tile in six colors.
Classic white subway. The safe hero. A glossy white or soft-gray subway pattern instantly reads "renovated kitchen" and goes with everything, including the gray or white shaker cabinets most rentals and builder kitchens already have. Gel subway tiles look the most real; vinyl subway is the budget version and still convincing from a step back.
Marble-look gel. A white-and-gray veined marble in a gel finish is the trick that punches above a rental's budget. The domed coating catches light like stone, so it photographs like a real remodel — ideal if you want the kitchen to look expensive without touching the counters.

Moody sage-green. If you want personality instead of neutral, a sage or deep-green tile — square, fish-scale, or zellige-look — turns a plain white rental kitchen warm and current. It pairs especially well with wood or natural-toned open shelving. (Green is a rising search for a reason.)

Farmhouse texture. For a cozier, cottage feel, look for beadboard-look panels or a handmade "wonky" white tile with soft edges. It softens a boxy builder kitchen and leans into the farmhouse and grandmacore looks without any real demo.
The coffee-bar corner. You don't have to tile the whole kitchen. A single peel-and-stick panel behind a coffee station — a few square feet on one wall — defines the corner and gives you a styled little scene for almost nothing. It's the lowest-commitment way to try the material before you commit to the main run.

Cover the landlord's ugly tile. The most renter-friendly use of all: stick a fresh pattern over an existing dated backsplash. It's the safest surface for removal (sealed tile) and it hides the one thing you can't change. Just make sure the old tile is smooth-faced and clean; heavy grout lines can telegraph through thin vinyl, so gel or a thicker tile hides them better.
Behind the stove: the heat rule you can't skip
Standard vinyl peel-and-stick is not rated for direct high heat. Most vinyl and PET tiles start to soften or discolor above roughly 140°F, and the area right behind a burner — especially a gas flame that flares toward the back — gets hotter than that. Put plain vinyl there and it can curl, bubble, or scorch.
Here's how to do the stove zone safely:
- Keep clearance. Manufacturers and installers generally recommend keeping the first row of tiles about 6–9 inches from a gas burner (some specs say up to 12). Your countertop-to-tile gap and the stove's own back guard usually cover part of this.
- Use the right material in the hot zone. Choose a tile explicitly labeled heat-resistant (manufacturers typically rate these around 190–250°F) or use metal tiles right behind the range. Save the cheaper vinyl for the cooler runs.
- No back guard? Add a shield. If your range has no raised metal panel at the back, a thin stainless-steel or aluminum sheet in the immediate hot zone protects the wall and gives you a clean surface to work around.
- Always check the product's own rating and follow your range's clearance instructions and local code. Treat the numbers above as general guidance, not a guarantee for your specific tile.
If any of that feels like too much, the easy answer is to simply stop the backsplash short of the stove and keep peel-and-stick to the cooler walls.

How to put it up so it lasts — and comes off clean
The install is genuinely easy; the prep and the removal plan are what protect your deposit.
Prep (this is 80% of the result).
- Wipe the whole area with a degreaser — kitchen walls carry invisible cooking film, and grease kills adhesion.
- Let it dry fully. Fill any small holes and, on a textured wall, lightly sand or skim the worst bumps smooth.
- Find your center or a clean vertical line to start from, so the pattern stays straight.
Apply.
- Peel a little backing at a time and smooth as you go, pushing air bubbles out toward the edge.
- Cut around outlets and edges with a sharp utility knife.
- On a textured or borderline wall, reinforce the edges with a little clear silicone or double-sided tape so corners don't lift over time.
Plan the removal now, not on move-out day. When it's time to take it down:
- Warm each tile with a hairdryer to soften the adhesive.
- Peel slowly from one corner at about a 45° angle — the method tile makers recommend, because slow is what saves the paint.
- Clean any leftover tack with a paint-safe adhesive remover, then wipe with warm, soapy water.
That sequence is the difference between "wall looks untouched" and "wall needs repainting."

A weekend order
- Test your paint with one hidden tile if you're unsure (do this a week ahead).
- Measure the area and buy ~10% extra for cuts and mistakes.
- Degrease and smooth the wall.
- Sort the stove zone — heat-resistant/metal tile with clearance, or stop short of the stove.
- Apply from a straight center line, reinforcing edges on iffy walls.
- Keep the leftovers and the receipt for touch-ups and your removal kit.
Done right, that's a kitchen that looks remodeled for a fraction of the cost — and comes off cleanly when you want a change.

FAQ
Does a peel-and-stick backsplash damage walls or come off cleanly?
Over sealed surfaces like existing tile or glass it usually removes with little residue. On painted drywall it can lift paint — the risk is low on semi-gloss/satin paint and higher on flat/matte paint or after the tiles have been up for years. Warm each tile with a hairdryer and peel slowly at a 45° angle to protect the paint.
Can I use it behind a gas stove?
Not standard vinyl in the direct hot zone — it can curl or discolor above about 140°F. Use a tile labeled heat-resistant or a metal tile there, keep the first row roughly 6–9 inches from the burner, and add a thin stainless or aluminum sheet if your range has no back guard. Always follow the product's temperature rating and your range's clearance rules.
Will it stick to textured or matte walls?
Poorly, on its own. Textured and flat/matte paint are the surfaces manufacturers warn about — tiles bubble, lift, or grab the paint. If that's your wall, lightly sand or skim it smooth, prime it, and reinforce the edges with extra adhesive, or plan for a less clean removal.
Does it actually look real, and how long does it last?
Gel/3D tiles look the most convincing because the raised coating catches light like real tile; quality vinyl is close from a normal viewing distance. As a rental-length upgrade — a few years — a well-applied backsplash holds up fine in a normal kitchen; direct heat and constant water at the edges are what shorten its life.
Is it cheaper than a real backsplash?
Far cheaper, and the bigger savings is labor: there's no tile setter, no grout, and no permanent change to undo. Vinyl is the most budget-friendly, gel costs more for the realistic look, and metal is the priciest — so many people use metal only behind the stove and vinyl or gel everywhere else.